Introduction to Plaid Layer
Onboard users instantly with just a phone number
Overview
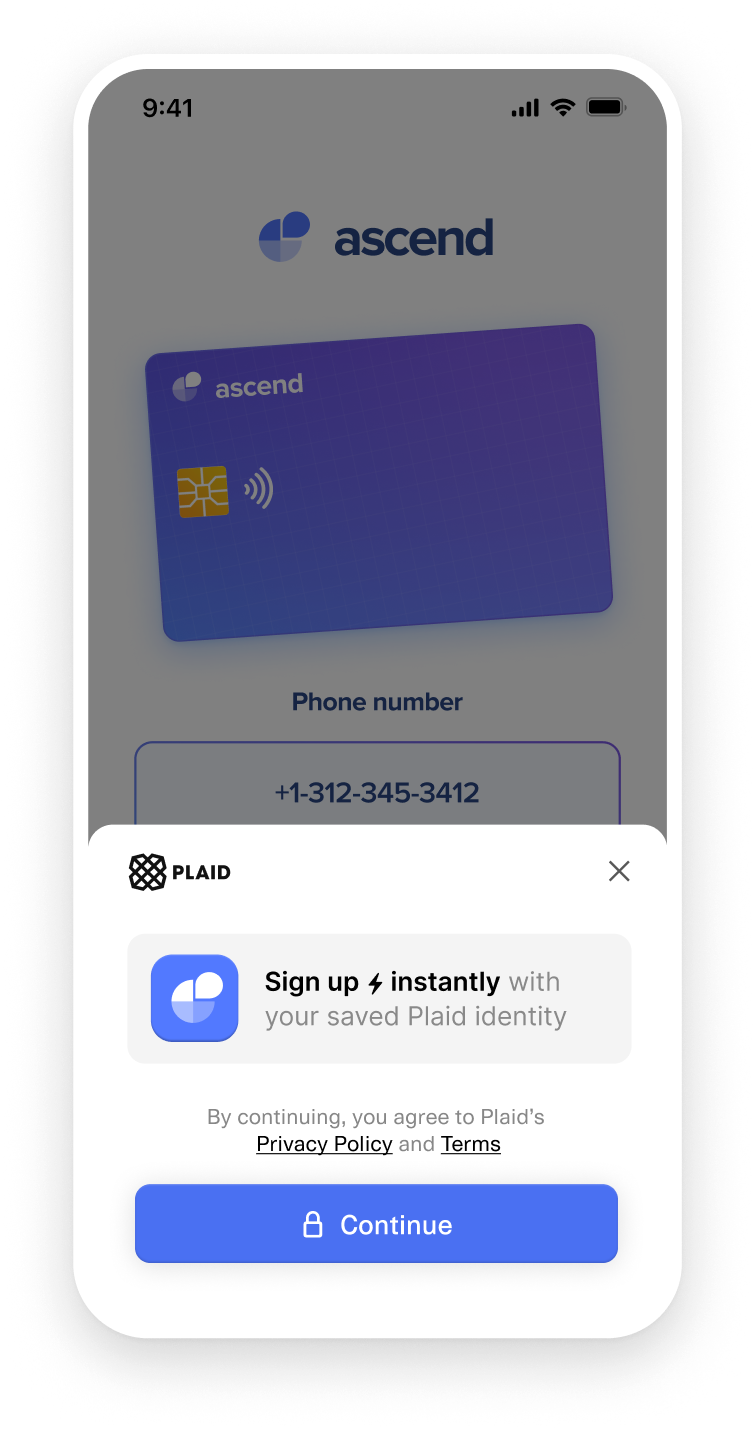
Instantly onboard millions of people from the Plaid Network with Layer (US only).
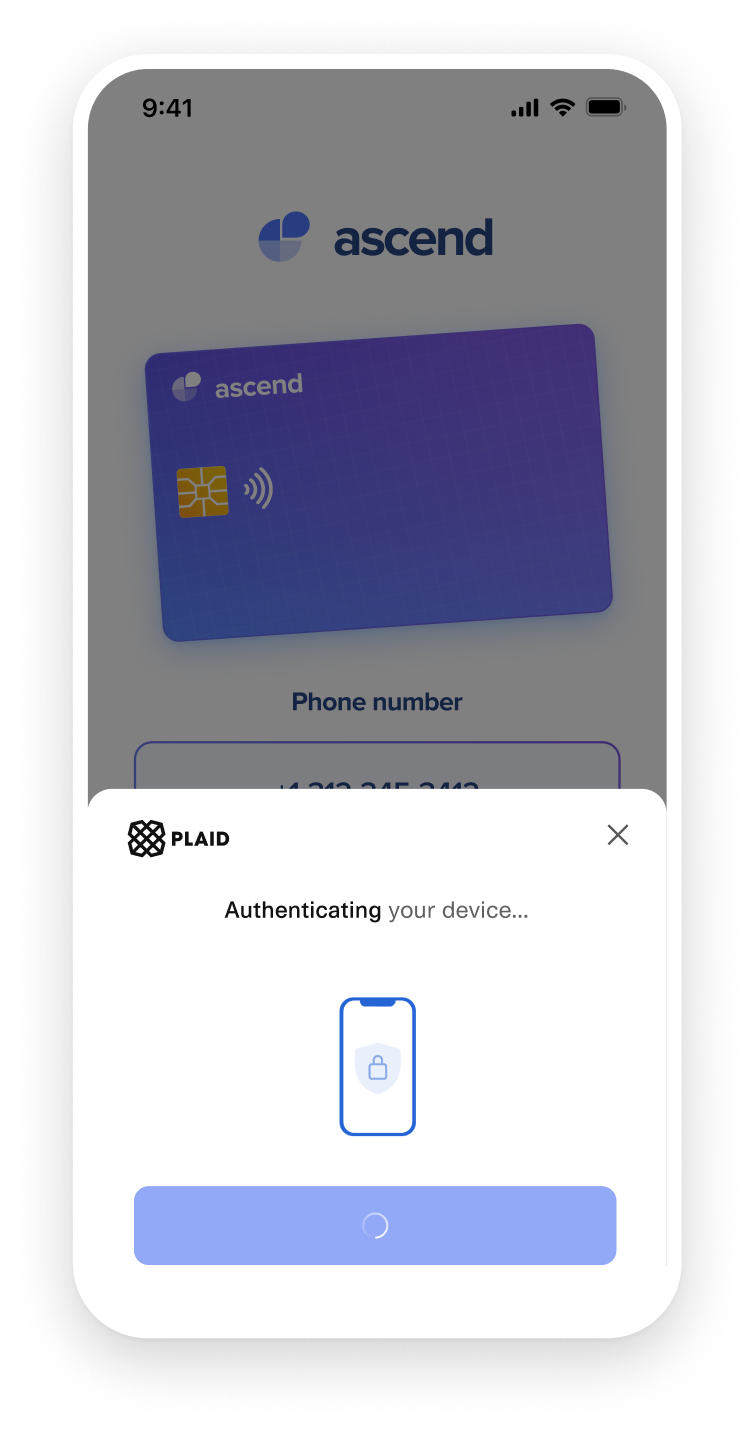
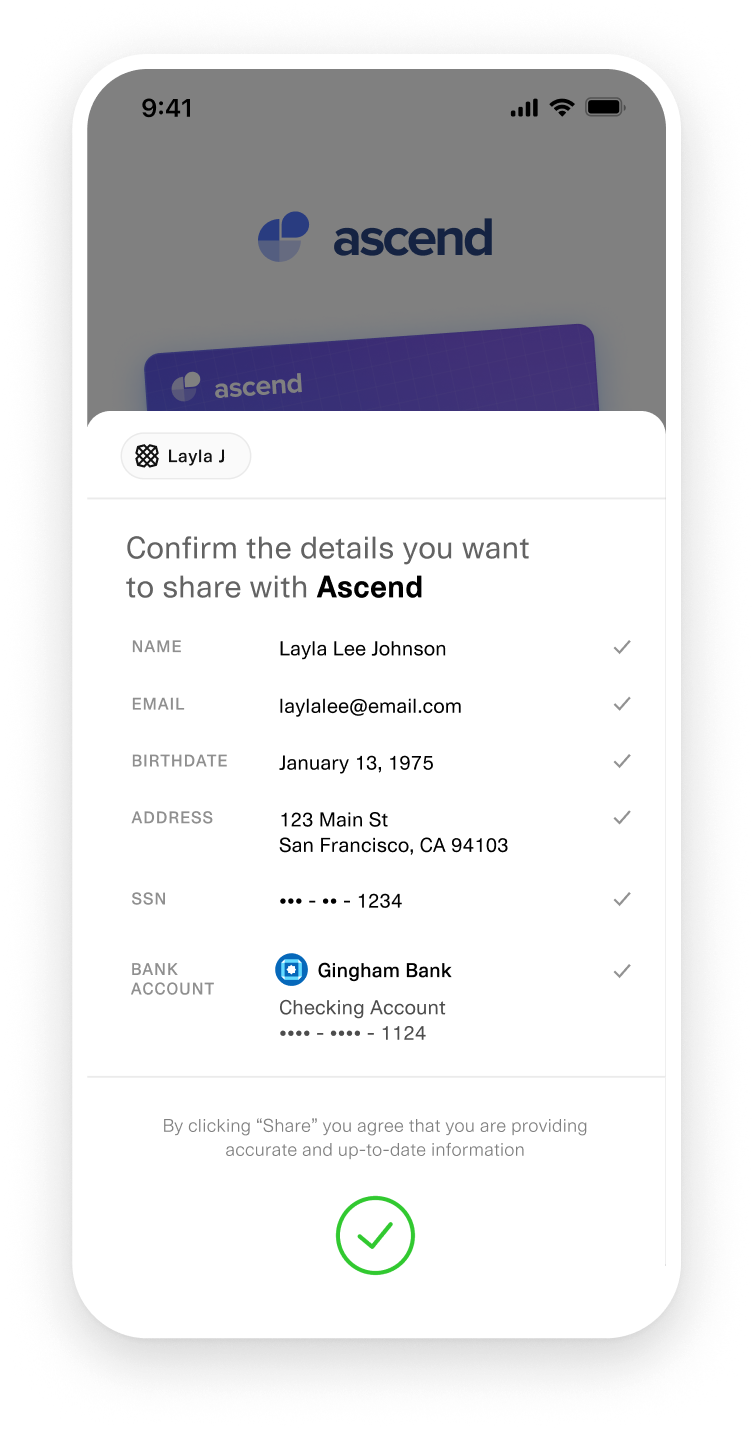
When a user provides their phone number, Plaid Layer checks whether they are part of the Plaid Network and verifies that they meet your onboarding requirements. Plaid Layer then authenticates the device and performs real-time risk analysis to reduce the risk of fraudulent sign-up attempts. After the user confirms their details and decides which financial account they want to share, you can verify their identity using your KYC provider and connect their accounts with Plaid.


To get started with Layer, contact Sales to request Sandbox access.
See a live, interactive demo of a Plaid-powered onboarding flow using Layer.
Integration overview
If you use Layer with Consumer Report or other Plaid Check Products, see the Plaid Check / Layer onboarding guide.
Configure a Layer template via the Dashboard. A template is created by default on first visit. You can customize the template's name, set logo and colors to match your brand, and configure eligibility requirements. In general, fill rates for different user data identity fields are highly correlated with each other (i.e., if Plaid has access to one piece of user identity information, it very likely has access to all of them), so you should set "required" and "optional" eligibility requirements based on your true business needs.
Call
/session/token/createwith the template ID for the Layer template you configured. This will return alinkobject that contains alink_token.On your client, create an instance of Link using the
link.link_tokenstring returned by/session/token/create. With Layer, you should create the Plaid handler object (i.e. viaPlaid.create(...)) as early as possible so Link can pre-load in the background. This ensures the fastest possible experience for your users.If you have an existing Android integration that does not use a
PlaidHandleror that usesOpenPlaidLinkinstead ofFastOpenPlaidLink, or an existing React Native integration that usesPlaidLinkinstead ofcreateandopen, you will need to update your client-side Link opening code to take advantage of the new faster loading scheme. For details and sample code, see React Native: opening Link and Android: opening Link.Once you have a user's phone number, pass it to the Plaid handler object:
handler.submit({ "phone_number": "+14155550015"}). Link will quickly check if the user is eligible for Layer, and call the LinkonEventcallback with eitherLAYER_READYorLAYER_NOT_AVAILABLE. Note that if the phone number uses a country code other than +1, the result will always beLAYER_NOT_AVAILABLE, as Layer does not support international phone numbers.When you receive
LAYER_READY, it means the user is eligible and you should callhandler.open()to immediately present the Layer UI.(Optional, recommended) If you receive
LAYER_NOT_AVAILABLEinstead, collect the user's date of birth andsubmitit via the same handler as earlier, e.g.handler.submit({ "date_of_birth": "1975-01-18"}). If you receiveLAYER_READY, the user is eligible for Layer Extended Autofill and you should callhandler.open()to immediately present the Layer UI; the flow continues at step 8. If you receiveLAYER_AUTOFILL_NOT_AVAILABLE, the flow continues with the next step.If neither Layer nor Layer Extended Autofill are available, you may discard the handler object and continue with any non-Layer flow in your app. For example, if your application falls back to a non-Layer product flow, you'd create a new Link token and handler to present that flow. If your non-Layer flow involves creating a Link token, include the
phone_numberwhen calling/link/token/createfor a faster end user experience.After you have launched the Layer flow in Link via
handler.open(), the end user enters the Layer flow. You will receive aLAYER_AUTHENTICATION_PASSEDwebhook once Plaid has determined that the end user has demonstrated ownership of the phone number, via either OTP or SNA. If the end user does not fully complete the Link flow but you receive this webhook, you can skip any OTP phone number verification steps you would otherwise implement.Once the end user has successfully completed the Layer flow in Link, you will receive an
onSuccesscallback and aSESSION_FINISHEDwebhook, both of which contain thepublic_token. Use the receivedpublic_tokenwith the/user_account/session/getAPI in order to retrieve the user's profile information and any linked Items.
Sample code
For a walkthrough of integrating Layer, including sample code across multiple platforms, see Add Layer to your app.
Minimum SDK versions
As Plaid is actively adding new Layer functionality, it is strongly recommended that you use the latest SDK version and keep up to date with SDK updates if your app uses Layer.
If you are developing for the web using the JavaScript SDK, Plaid will automatically provide the latest available SDK. Otherwise, see libraries for links to the latest SDKs.
If you are developing a native mobile application, Layer requires SDK versions from June 2024 or later. Minimum versions are 6.0.4 (iOS), 4.5.0 (Android), 11.11.0 (React Native), and 3.5.2 (React). For Extended Autofill support, minimum versions are 6.3.1 (iOS), 5.3.0 (Android), 12.4.0 (React Native), and 4.1.1 (React).
Layer is not compatible with the Hosted Link integration mode.
Extended Autofill
Extended Autofill allows you to use the user's date of birth as a fallback for autofilling their identity data if their phone number is not Layer eligible. For Extended Autofill support, minimum SDK versions are 6.3.1 (iOS), 5.3.0 (Android), 12.4.0 (React Native), and 4.1.1 (React).
To use Extended Autofill, after receiving LAYER_NOT_AVAILABLE, submit the date of birth, e.g. handler.submit({ "date_of_birth": "1975-01-18"}). This must be in a separate call, made only after calling submit with the user's phone number. You will get either a LAYER_READY callback (success) or a LAYER_AUTOFILL_NOT_AVAILABLE callback (failure).
Extended Autofill is still subject to the same eligibility requirements that you defined in your Layer template. You may wish to make Collect financial accounts "Optional" instead of "Required" in your eligibility requirements, as Extended Autofill users are less likely to have connected account information.
When using Extended Autofill, in order to reduce onboarding friction, it is strongly recommended to prompt the user for their date of birth only after receiving LAYER_NOT_AVAILABLE, rather than requesting it upfront.
Intelligent Account Sorting
By default, Layer orders accounts in Link based on which one is likeliest to have the highest conversion. With Intelligent Account Sorting, you can instead prioritize either the highest-balance account or the account that Plaid detects as being the user's primary bank account. The prioritized account will have a "Recommended" badge displayed next to it in Link. Intelligent Account Sorting may be a good fit for customers are using Layer in flows for cashflow underwriting, EWA, or cash advance.
To enable Intelligent Account Sorting, contact your Plaid Account Manager, and specify which prioritization scheme (primary account or highest balance account) you prefer and which Link customizations the scheme should be applied to.
Testing Layer
In Sandbox, the authentication code for all phone numbers is 123456. The basic test phone number is 415-555-0011, which will connect to a standard profile with full PII and two connected banks. The date of birth (for Extended Autofill testing) is 1975-01-18. The following phone numbers are all valid in Sandbox for Layer testing:
| Phone number | Notes |
|---|---|
| 415-555-0000 | Missing all identity and bank data |
| 415-555-0011 | Default number for testing |
| 415-555-0012 | Missing PII; 3 connected banks |
| 415-555-0015 | Standard profile with a single bank |
| 515-555-0013 | Missing email |
| 515-555-0015 | Missing DOB |
| 515-555-0016 | Missing SSN |
| 515-555-0017 | Missing address |
| 515-555-0018 | Missing name |
| 515-555-0019 | Standard profile, but savings account only |
Note the area code is not the same in all of these test numbers.
In Production, the authentication step of Layer is dynamic and may authenticate the user via Silent Network Authentication, SMS OTP, or Passkeys (coming soon), depending on the user and the device; authentication checks such as trusted device matching or mobile carrier checks (for SIM swaps, port outs, etc.) are also run in Production.
Sandbox provides a simplified authentication experience: in Sandbox, users can only be authenticated via OTP, and authentication checks are not run.
Testing Layer with custom Sandbox users
To test Layer with specific combinations of account types, transactions, or other data, you can create a custom Sandbox user. To use this user in Layer:
- After launching Layer with an eligible phone number, on the Confirm details pane, click the edit button (the pencil icon) next to the Bank Account entry.
- Then select Add new account
- From there, complete the flow, logging in as your custom Sandbox user.
- When you complete Link and make API calls, you will see the custom Sandbox data you seeded.
Testing Extended Autofill
To test Extended Autofill, you can follow one of two different scenarios:
Submit any phone number that fails Layer eligibility completely, like
415-555-0000, with a template that specifies Collect financial accounts as Optional or Skip. The user will be eligible for Extended Autofill, and you will receive a full set of identity information.Submit any of the phone numbers above that are missing some identity information (such as
515-555-0017) while using a Layer template that requires that information. The user will not initially be eligible for Layer, but they will be eligible for Extended Autofill, because it will fill in the missing gaps in the user data. In this scenario, you will receive a full set of identity information and a connected bank account.
In both cases, submit 1975-01-18 for the user's date of birth.
Layer webhooks
Layer has the following webhooks:
| Event | Meaning |
|---|---|
LAYER_AUTHENTICATION_PASSED | A user has been authenticated |
SESSION_FINISHED | A Layer session has finished |
Layer events
In addition to the standard Link events, Layer has the following events:
| Event | Meaning |
|---|---|
LAYER_READY | Plaid found data matching template requirements; call handler.open() to present Layer |
LAYER_NOT_AVAILABLE | No data found matching template requirements based on the phone number; prompt for date of birth or use non-Layer flow |
LAYER_AUTOFILL_NOT_AVAILABLE | No data found matching template requirements based on the phone number + date of birth; use non-Layer flow |
SUBMIT_OTP | User has entered an OTP code to verify their phone number (also used by Returning User Experience) |
VERIFY_PHONE | User has successfully verified their phone number (also used by Returning User Experience) |
For a full list of events, see the Link onEvent documentation.
Example event sequences
The sections below illustrate typical frontend event sequences for different Layer scenarios. For more details on frontend events, see the Link onEvent documentation.
LAYER_READY
OPEN
TRANSITION_VIEW: CONSENT
TRANSITION_VIEW: VERIFY_PHONE
TRANSITION_VIEW: PROFILE_DATA_REVIEW
VERIFY_PHONE
HANDOFF (with onSuccess callback)LAYER_READY
OPEN
TRANSITION_VIEW: CONSENT
TRANSITION_VIEW: VERIFY_PHONE
SUBMIT_OTP
ERROR: INVALID_OTP
SUBMIT_OTP
ERROR: INVALID_OTP
SUBMIT_OTP
TRANSITION_VIEW: ERROR
ERROR: PROFILE_AUTHENTICATION_FAILED
EXIT (with onExit callback)LAYER_NOT_AVAILABLE
LAYER_AUTOFILL_NOT_AVAILABLEMeasuring conversion
To track Layer performance, measure the following ratios:
Layer eligibility percentage: LAYER_READY event count / handler.submit(phone_number) count. Ensure you do not count handler.submit calls for date of birth.
Layer conversion: onSuccess callback count (or HANDOFF event count) / OPEN event count
Billing
When using Layer, a billing event is incurred for each converted Link session (when onSuccess fires). You will not be billed for Layer eligibility checks or unconverted Layer sessions.