Resellers
Create and manage your customers
The Reseller Dashboard and API are functionality that Plaid has developed to support our authorized Reseller Partners. If you don't have a formal partnership established with Plaid, contact us to learn about signing up or to receive the appropriate contractual agreements to unlock this functionality.
Overview
This guide explains how an authorized Plaid Reseller Partner can create and manage their End Customer teams. Each one of your End Customers is required to have a unique set of Plaid API keys, which enables reporting their billable usage, filing and managing support issues, customizing their Plaid Link experience, and registering their applications with our financial institution partners.
Configuring your Reseller Partner team
When you join the Plaid Reseller Partner program, you will work with your Partner Account Manager to set up a Reseller Partner team for your company.
Get started by signing up for a Dashboard account, which will automatically create a team for you. Next, talk to your Partner Account Manager to configure your team as a Reseller Partner team.
If you already have a Plaid Dashboard account, or are using Plaid for a separate use case or business line, we require that you create a separate Reseller Partner team. You can use the same Dashboard user account (email address) to access both teams.
Methods for creating and managing End Customers
Plaid offers two ways to create and manage End Customers:
- The Dashboard (described in this guide)
- The reseller API (documented in the reseller API reference docs)
The steps described in Configuring your Reseller Partner team are required regardless of whether you use the Dashboard or the reseller API.
If you expect to onboard a large number of End Customers, or if you'd like to minimize the amount of manual work required by your operations staff, we strongly recommend that you integrate with our reseller API, which allows you to programmatically incorporate End Customer creation and management into your onboarding flows.
Whether you create End Customers programmatically via the reseller API or manually in the Dashboard, they will be visible and active in both places. For example, if you create an End Customer via the API, you will be able to view it in the Dashboard, and vice versa.
Under the hood, the reseller API and the Dashboard behave identically and follow the same onboarding process, which is described in Creating End Customers.
Viewing the Dashboard as a Reseller Partner
Being a member of a Reseller Partner team automatically grants you permission to create and manage End Customers. However, you must first switch to your Reseller Partner team in the Dashboard to exercise these permissions.
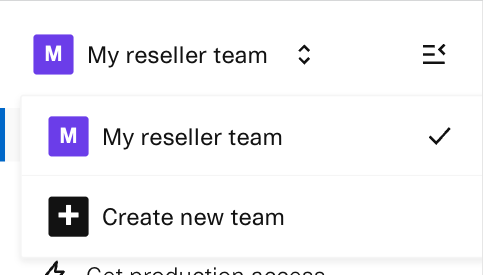
Ensure that your Reseller Partner team's name appears in the top left-hand corner of the Dashboard. If a different team's name is displayed, click the team's name to open the team switcher and then select your Reseller Partner team's name:

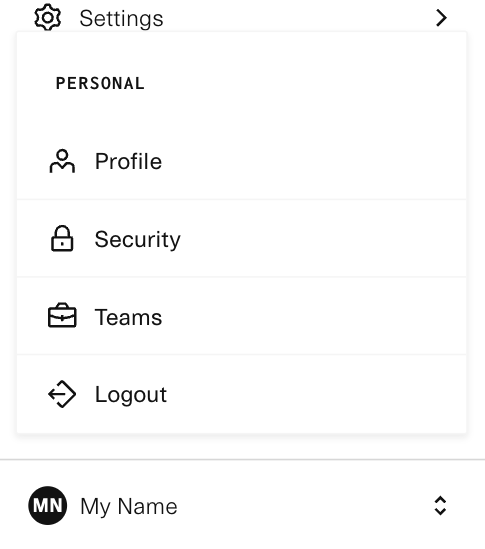
If your Reseller Partner team does not appear in the list (which can happen if you have a lot of End Customers), you will first need to go to the Teams page. Click on your name in the bottom-left corner of any page and select Teams.

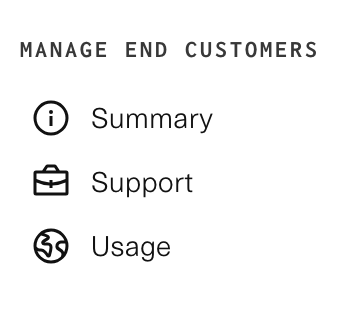
You can then access reseller partner features in the navigation bar on the left side of the dashboard

Creating End Customers
First, follow the instructions in Viewing the Dashboard as a Reseller Partner.
Next, select the team switcher in top left-hand corner and then click Create new team. Fill out and submit the form.
Plaid automatically enables new customers for Data Transparency Messaging, including all new End Customers. In Production, Link will not work if a use case has not been selected for Data Transparency Messaging.
To automatically populate a Data Transparency Messaging use case, when filling out the form to create a new team, Select "Apply customization from your default Link configuration" in the Link Customization dropdown. This will duplicate the default Link customization from your parent account, including the use case for Data Transparency Messaging.
Alternatively, you can individually customize this setting on the Dashboard on a per-End Customer basis by going to Link > Link Customization > Data Transparency.
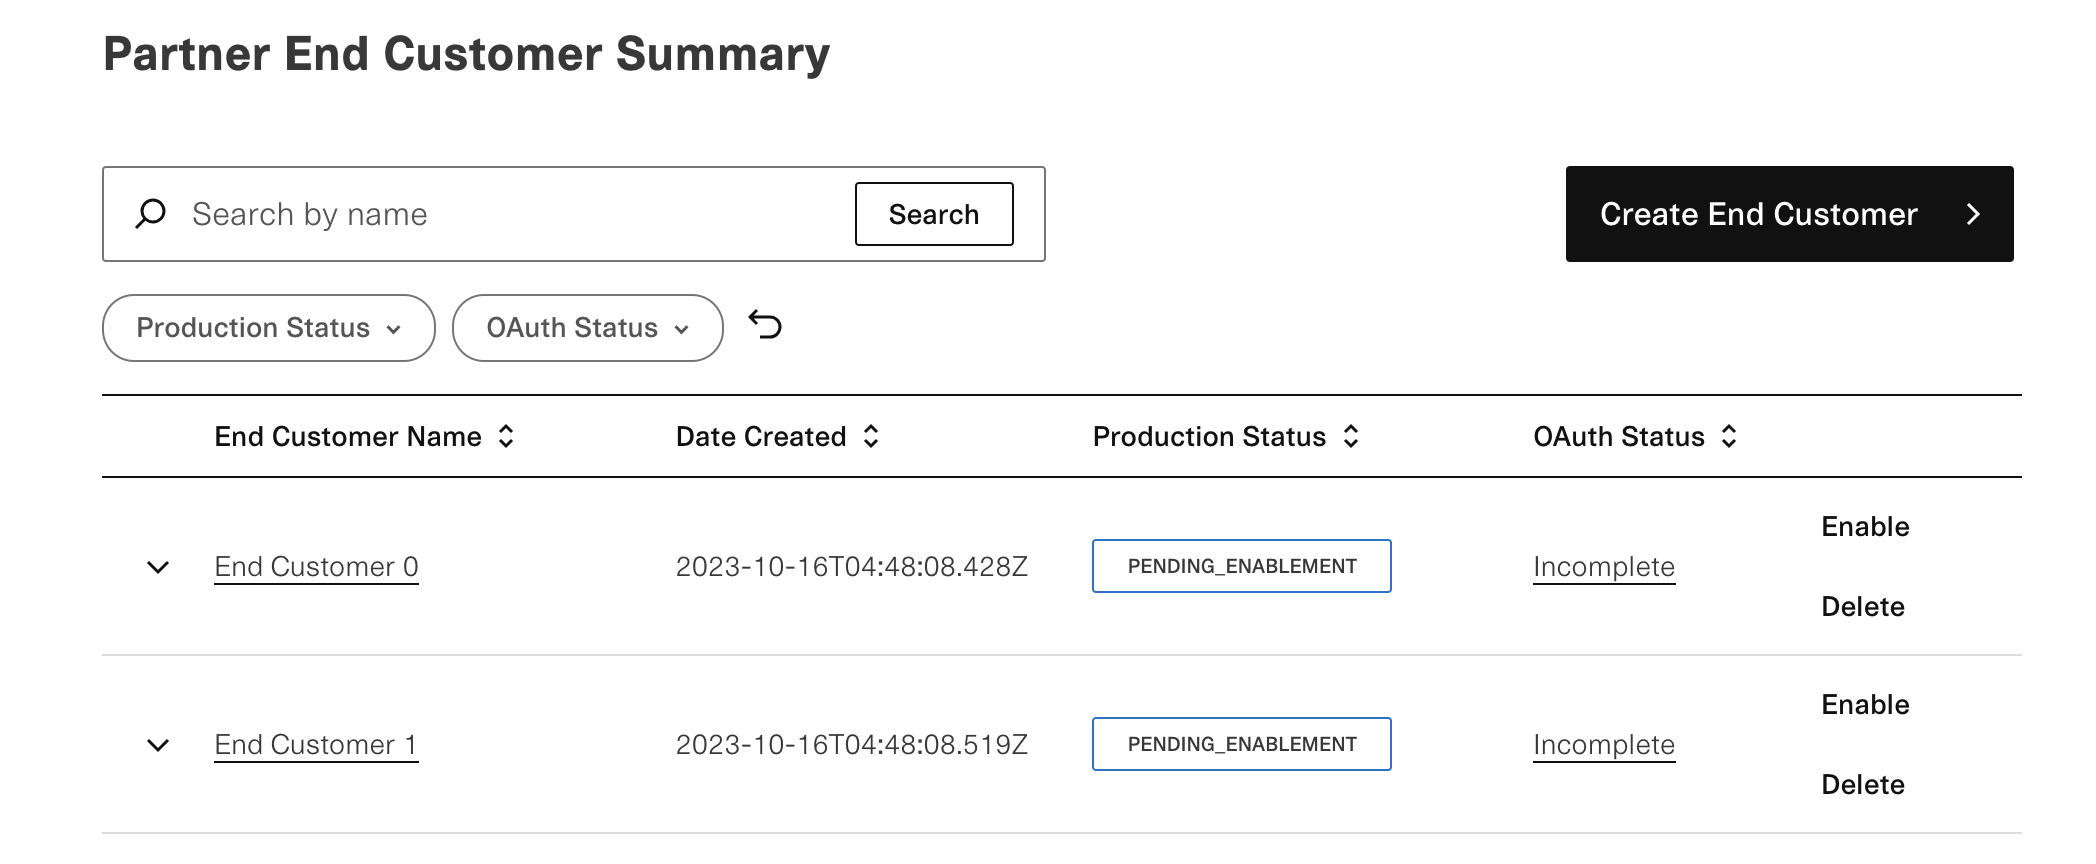
Once you have created the End Customer, it will appear in the Partner End Customer Summary page:

You can view the newly created End Customer's API keys by clicking on the End Customer and navigating to the Developers > Keys tab. The customer will automatically be enabled Sandbox and Limited Production to facilitate testing.
The newly created End Customer will be assigned a status, which will change as they move through the onboarding process. The possible statuses are described below:
UNDER REVIEW: You successfully created the End Customer, but more information is needed before Plaid can approve or deny them. This status is most commonly seen when the newly created End Customer is already a Plaid customer, in which case you will need to talk with your Partner Account Manager to resolve the channel conflict.DENIED: You successfully created the End Customer, but Plaid has determined that we cannot service them through your reseller contract. This status is most commonly seen in the case of channel conflicts (i.e., Plaid already has a contract with this End Customer).PENDING ENABLEMENT: You successfully created the End Customer and Plaid has approved them. You may now enable the End Customer (see the next section, Enabling End Customers, for details on the enablement process).ACTIVE: You successfully created and enabled the End Customer. The End Customer's API keys can now be used in the Production environment.
Enabling End Customers
When you create an End Customer, they will be enabled in Sandbox and Limited Production. This allows you to test your End Customers prior to enabling them for full Production access. It also prevents you from accidentally incurring billable activity prior to launching with your End Customers.
To enable an End Customer, find the end customer you wish to enable in the Partner End Customer Summary page, and then click the Enable button. Alternatively, you can select their team to navigate to the Overview page and then click Get production access.
Enablement happens instantly. Once the End Customer has been enabled for full Production, you will be able to make API calls to Plaid in the full Production environment. Any remaining unused credits for free API calls will not carry over into full Production.
When you enable an End Customer, Plaid will automatically begin registering them with financial institutions that require OAuth access for connectivity, such as Chase and Capital One. Registration at most institutions happens within 24 hours, but for some institutions it may take several weeks. You can check the registration status for all OAuth institutions via the OAuth institutions page for a given End Customer.
Alternatively, you can set up a webhook in the dashboard to get automatically notified when an End Customer has their OAuth status updated. To configure the webhook, go to the webhooks page and create a new webhook listening to the End Customer OAuth status updated event type. For details on the webhook, see the partner API documentation.
If you encounter errors during OAuth registration, or if after 3 business days your end customer has not been registered at any OAuth institutions, contact your Partner Account Manager for help.
Managing End Customers
All of your end customers' support tickets are searchable in the Partner End Customer Support page, and their API usage data can be found in the Partner End Customer Usage page.
Deleting End Customers
In some cases you may wish to delete an End Customer prior to enabling them for Production, possibly because they were created in error or because they are no longer working with you.
To delete an End Customer, go to the Partner End Customer Summary page, and then click Delete:

Deleting the End Customer will immediately deactivate their API keys and remove them from view in the Dashboard. This feature does not work for Production-enabled End Customers (those with a status of ACTIVE). To delete a Production-enabled customer, contact your Partner Account Manager.